How To Create Sessions and Session Blocks Within a Program?
This article will go over how to quickly add a session to a class package
- Access the Program
- In the control panel, locate the program you'd like to add sessions to. Click the pencil icon to the left to edit the program

- In the control panel, locate the program you'd like to add sessions to. Click the pencil icon to the left to edit the program
- Navigate to the Sessions Tab
- Once in the program editor, click the Sessions tab next to Settings to open the Add Sessions page
- Session Settings
- Toggle Open Registration to allow people to sign up
- Toggle Display Registration to make the session visible on the front-end
- Creating a Session
- Set the Price for each session
- Specify the Maximum Participant limit
- Select the facility where the session will take place (you must create a location under Programs -> Assets if it doesn’t exist yet)
- Fill in the Start Date, Start Time, and End Time
- Use the Title dropdown menu to customize how sessions are displayed to customers
- Optional Fields
- Toggle Is Active to activate the session
- If sessions repeat, choose a recurrence (daily, weekly, or monthly) and set an end date to create sessions in bulk
- Editing Sessions
- The Edit Sessions tab allows you to bulk edit sessions. You can either select specific sessions via checkboxes or apply changes to all sessions
- The Edit Sessions tab allows you to bulk edit sessions. You can either select specific sessions via checkboxes or apply changes to all sessions
- Filtering Sessions, use filters to find sessions by Facility, Date Range, or Days of the Week. You can edit:
- Start Time, End Time, and Title/Name
- Facility/Location
- Price and Registration settings (Open & Display Registration toggles)
- Is Active toggle
- Minimum and Maximum Participant limits
- Event notes
- Display Settings
- To customize how sessions are displayed, go to the Program Card -> Settings -> Main Info -> Display Class Sessions and choose an option from the dropdown
Helpful Tip:
- To allow users to register for individual sessions, make sure to check Open Registration, Display Registration, and Is Active
- If you want users to register for the entire program and automatically enroll in all sessions, only check Is Active
You can make groups of sessions be available for purchase by creating Session Blocks
- Access the Session Blocks Tab
- On a Program Package Card, navigate to the Session Blocks tab and click Add a Session Block to get started
- On a Program Package Card, navigate to the Session Blocks tab and click Add a Session Block to get started
- Enter Session Block Details
- Title: Provide a name for the session block
- Price: You can either have the price automatically calculated based on the price of individual sessions, or select Custom to set your own price
- Description: Use this field to give participants additional information about the session block
- Toggle Settings
- Open: Toggle this option to allow participants to sign up for the session block
- Renews: Toggle this option to automatically enroll participants into a new session block after the current one expires. Please note, you must create the future session block(s) in advance to enable renewal
- Set Renewal Options
- Renewal Date: Specify the date when the next block will renew
- Opt-Out Date: Set the last day participants can opt out of renewing
- Renewal Block: Ensure there are no overlapping sessions between blocks when choosing the renewal block
- Save the Session Block
- Once you’ve entered all the details, press Save to create the session block
- Add Sessions to the Block
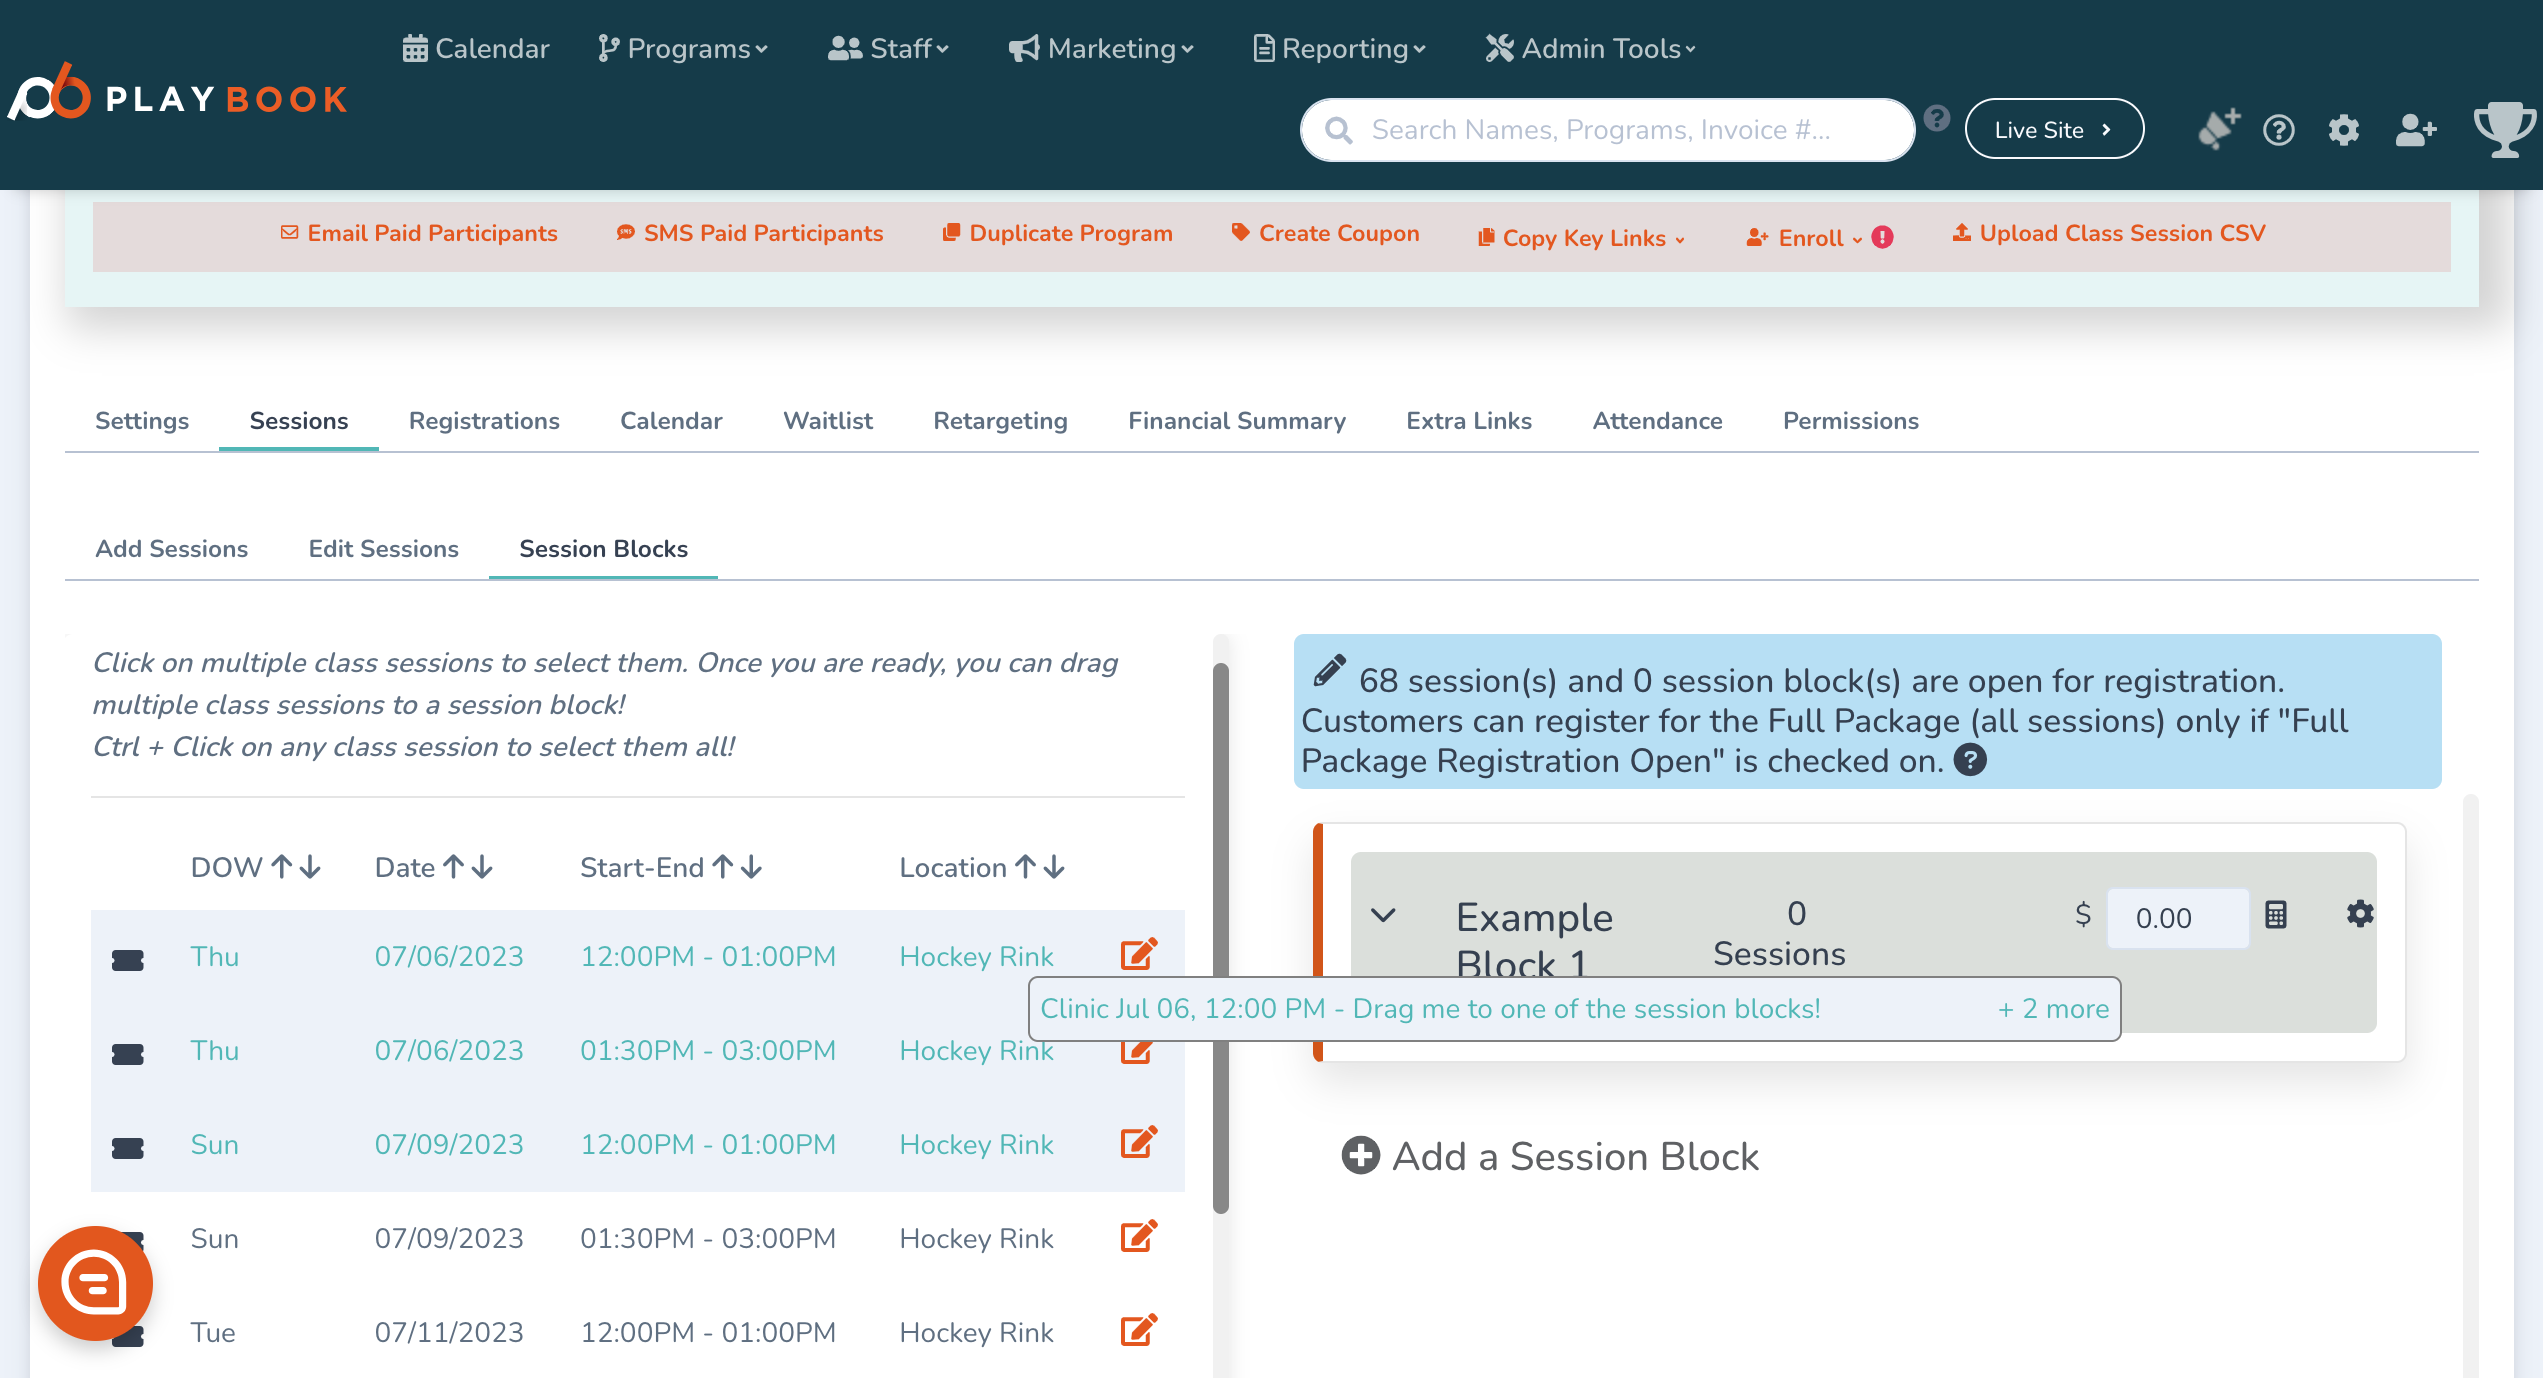
- After creating the block, you can drag and drop individual sessions from the left into your desired block

- To select multiple sessions, hold the Shift key while dragging and dropping
- After creating the block, you can drag and drop individual sessions from the left into your desired block
- Remove Sessions
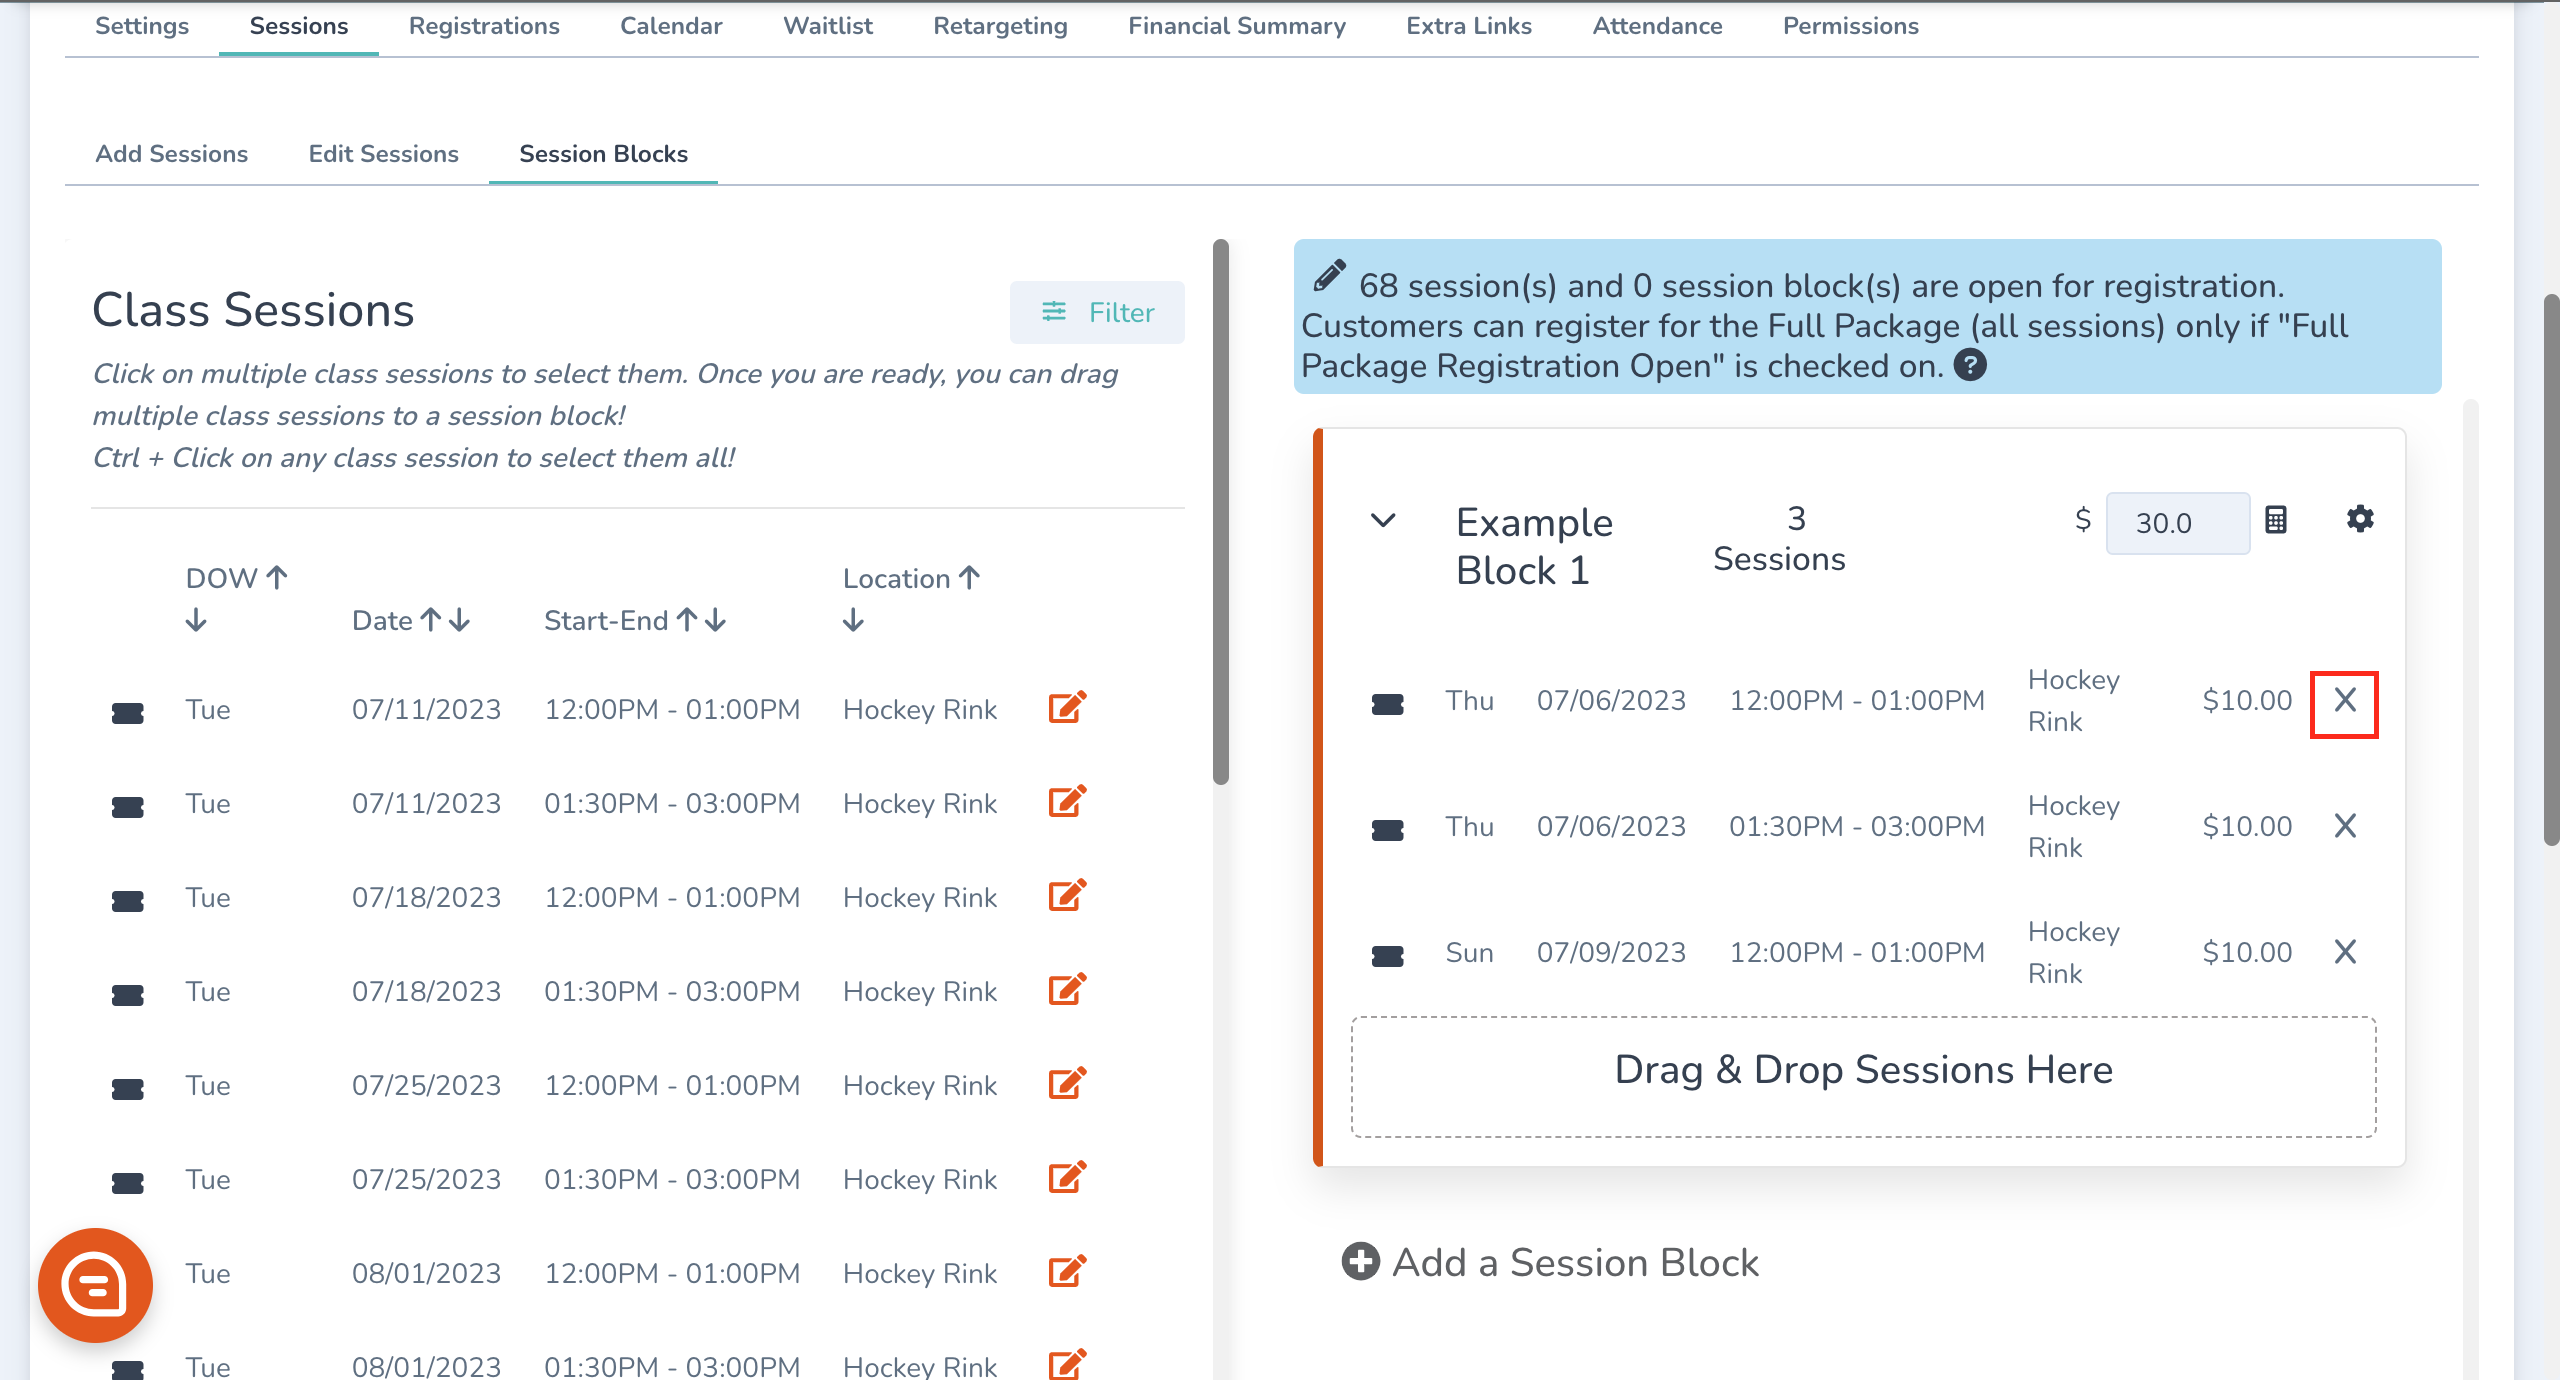
- To remove a session from the block, open the session block and click the X next to the session you want to remove

- To remove a session from the block, open the session block and click the X next to the session you want to remove
