- To create a new Membership, you will need to log in to the Playbook Back End of your website. (mywebsite.playbookapi.com/control_panel)
- From the top navigation bar select Programs then Memberships. Here you can see a list of your current memberships
- Click on the orange Create Memberships button located above the columns
- You will have the option to clone or Start From Scratch. Select 'Start From Scratch' for now

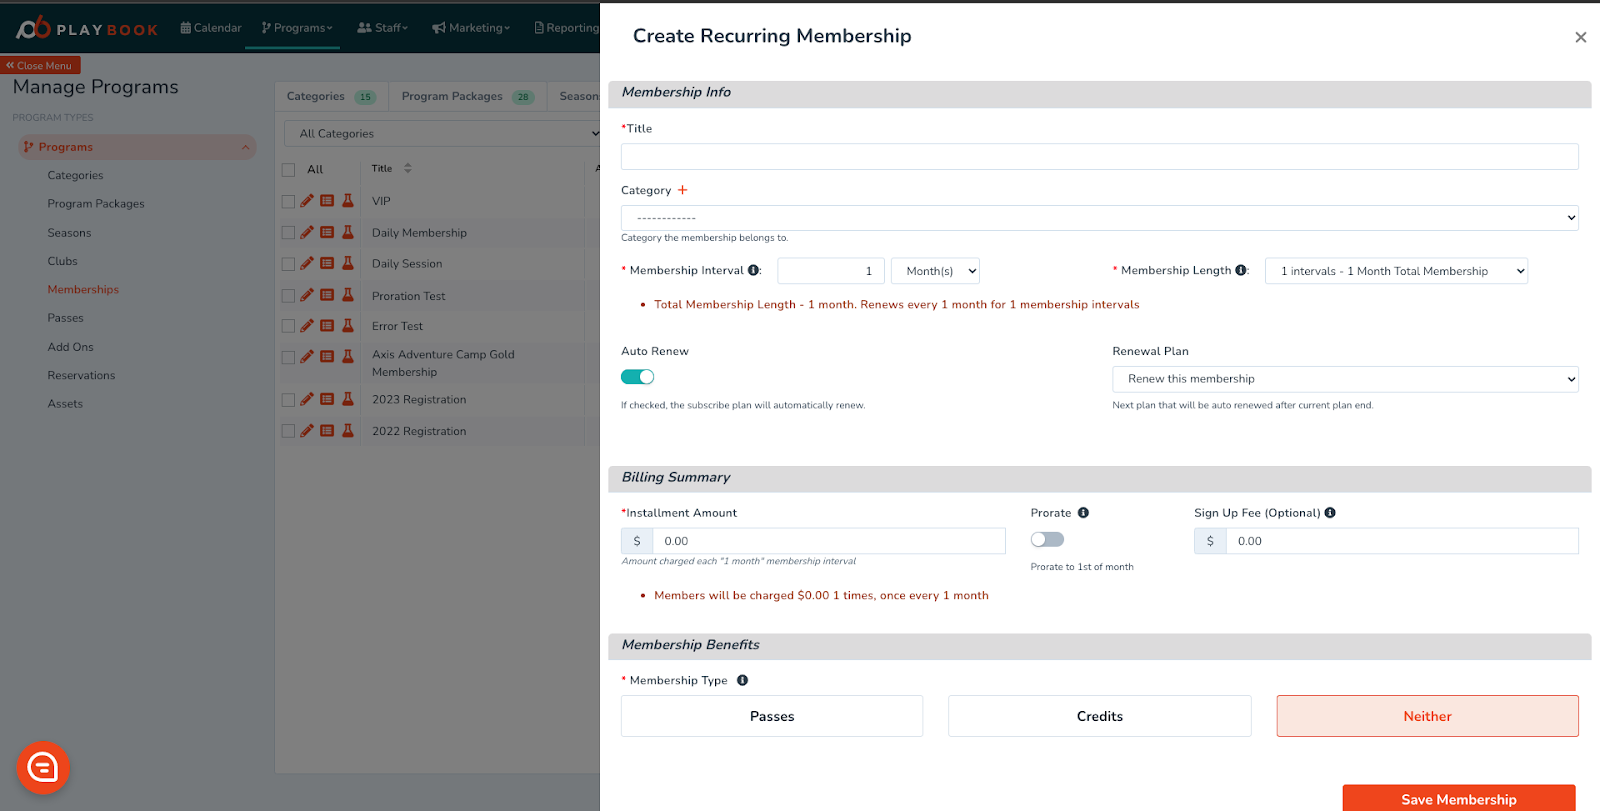
- A pop-up window will appear allowing you to enter some basic details about your new membership
- You can give a Title/name to the membership
- You can also link the membership to a specific category
- The Membership Interval is how often users will be charged when in this memberships. You can also change the units between days/weeks/months/years
- Membership Length is the total length the membership will last for, or can be considered how many intervals the membership is valid for
- You can toggle Auto Renew as well as choose a membership plan to renew into
- The Installment Amount is how much will be charged at each interval
- You can also choose to have a one-time Sign Up Fee that will apply to all initial purchases of the membership
- There are also different types of membership benefits you can choose to apply
- With Passes, you have the option of giving members access to a number of specific programs per interval. Simply select the pass type from the drop down, and input the number of passes you would like to give. (Check out the Passes article for more information) You can add multiple pass types by clicking + Add Pass Type Unlimited
- You can quickly add a pass type by clicking, which will take you to a pop-up window that lets you name the pass, select the type of pass between session, duration and dollar values, choose the category and class package, as well as toggle the Make Passes Expire option
- You can also toggle Is Unlimited if you wish to give members unlimited passes to a program (eg coach discount)
- Credits are dollar amounts that can be used to register for any program in the system, and you can simply enter the number of credits you’d like to provide in dollars (eg a membership to a batting cage will give $300 in credits)
- With Passes, you have the option of giving members access to a number of specific programs per interval. Simply select the pass type from the drop down, and input the number of passes you would like to give. (Check out the Passes article for more information) You can add multiple pass types by clicking + Add Pass Type Unlimited
- Once you are happy with the initial settings, go ahead and press Save Membership. You should then be loaded back into the Memberships page and see your new membership in the list. Note that the membership will not be active yet, so go ahead and click on the orange pencil icon next to the membership to open the Edit Window
- Here you will be able to toggle Is Active on to make the membership available for purchase
- You can also choose to put a Capacity Constraint on your membership by toggling it on
- You’ll also be able to toggle Show Available Spots as well as Offer Waitlist
- If you go to the Optional Info page, you’ll be able to see some more options
- You can choose to toggle Wishlist Available on or off
- You can also set the registration open and close dates. It is important to note that the registration close date will automatically be set to the end of the first interval
- The Registration Flow Instructions tab can be used to note anything you would like the registrants to also be able to see.
- 1 will show on the 1st registration page, 2 will show up on the payment page and 3 will show up on the final thank you page
- Advanced Registration Options are where you can set a few more restrictions
- Gender
- Sport/Activity
- Age Restriction using ages or birthday
- Add a featured image to the membership that is separate from the main website image
- The Customize Forms tab is where you can add any custom questions
- Waivers is where you will be able to add any waivers. Note that any Universal Waivers will already exist on the page
English