
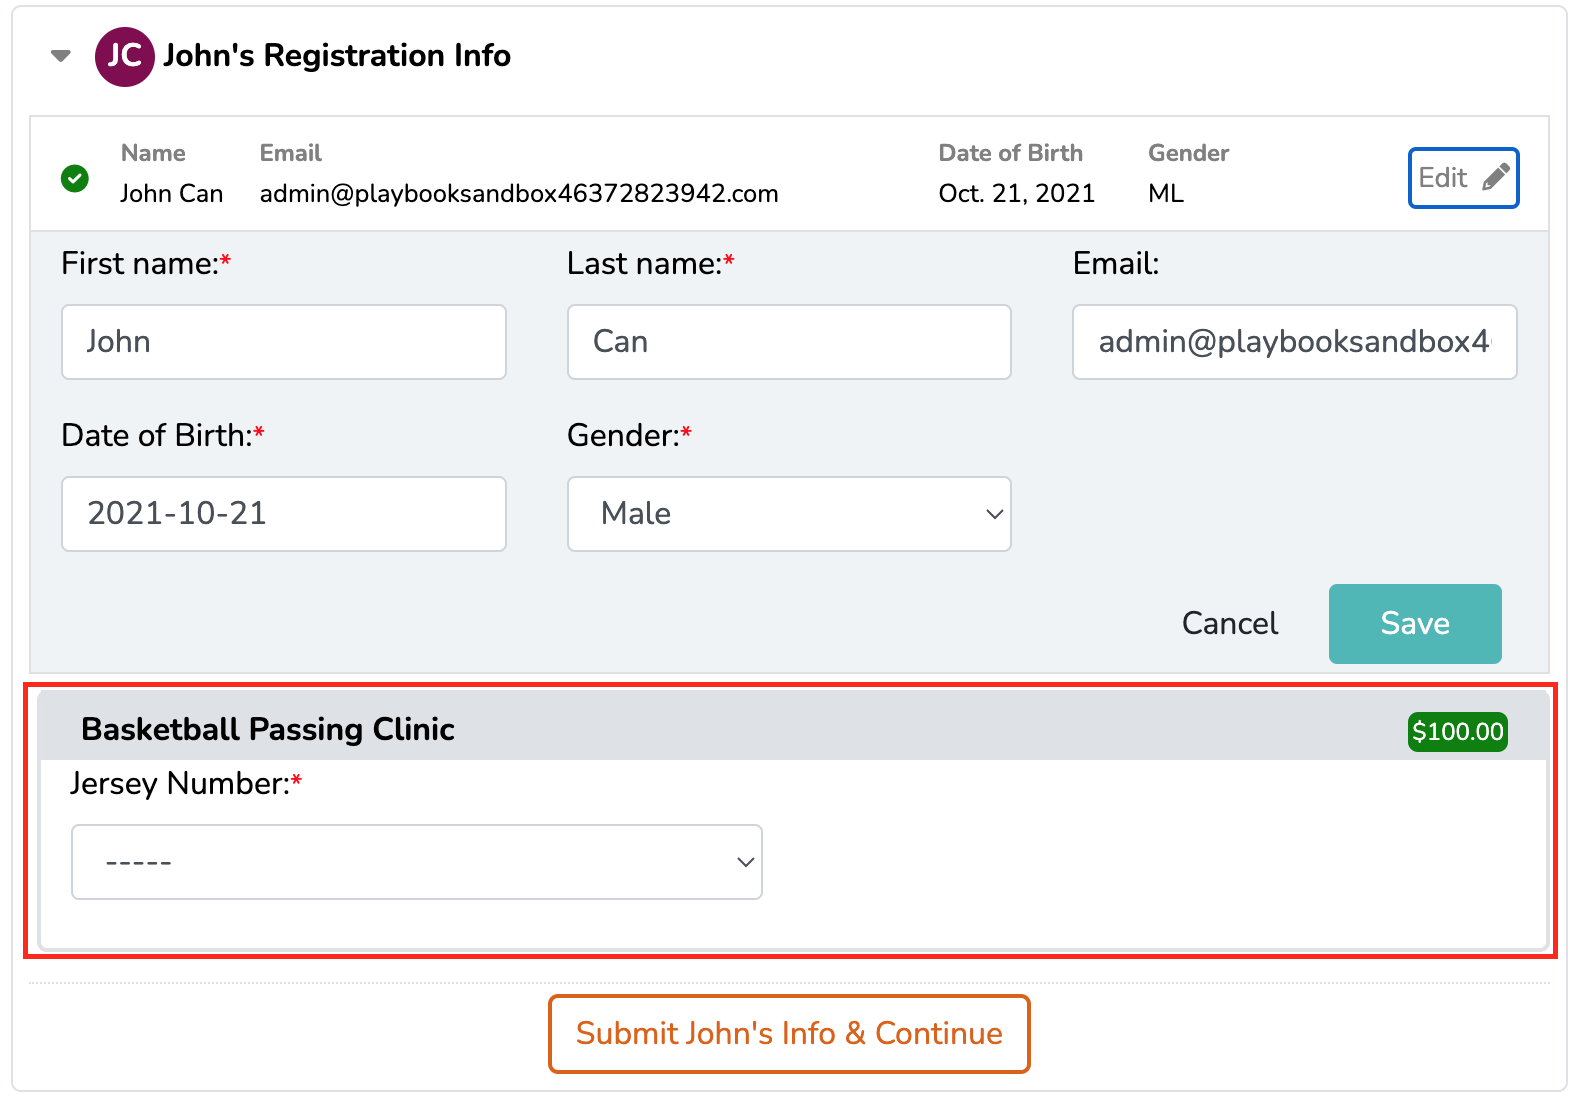
Any custom field will appear on the registration form under “extra info”.
The red box in screenshot below is an example of a custom field displayed on a registration form:
- To create a Custom Field, first go to the site settings by clicking the gear icon on the top right of the back-end page (mywebsite.playbookapi.com/control_panel/site_settings)
- From the left, click on Registration Settings then click Custom Fields

- Here you will see a toggle for Allow Custom Form, you should make sure this is turned on if you want to ask custom questions in your registration process
- You can also see the current list of Custom Fields. You can click the Add New Custom Field on the top right to get started with your new custom field
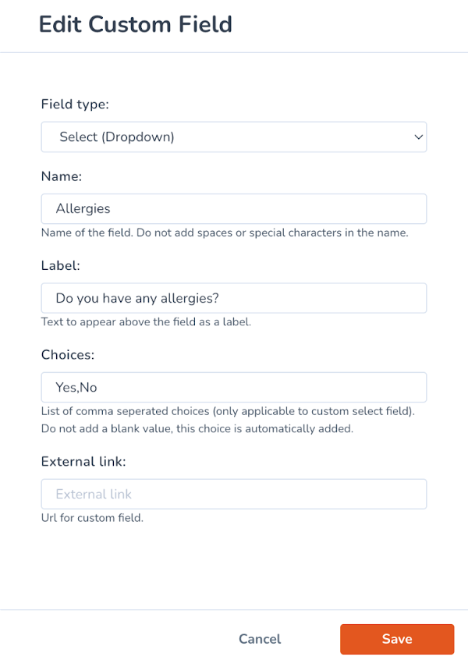 A pop-up window will open where you can start to set up all relevant information
- Field Type is the type of answer you want the question to be answered in. Options are as follows:
- Paragraph
- Text
- Date Time
- Date
- Check Box
- Single Line
- Text
- Decimal
- Email
- Number
- Select (from dropdown menu)
- Agreement
- File Field
- Image Field - Name is the title or what the ‘Custom Field’ will be known as to administrators and the system
- Label is the text to appear to customers, or the question you want to ask registrants
- Choices is for the the Select Field Type, where you will put the dropdown options
- The options must be separated by commas
- You can also put in a url for a custom field with External Link
- Once you are happy with your custom field, press save and now these fields will
- Field Type is the type of answer you want the question to be answered in. Options are as follows:
Once you are done, you can now assign the custom field to a registration form:
- Go to the Program Package/Season card you would like to add Custom Fields to
Note that you will not be able to add a custom fields while creating a new program package, but can add them directly after the initial setup
- From the Settings tab, head over to:
- Customize Forms for Program Packages
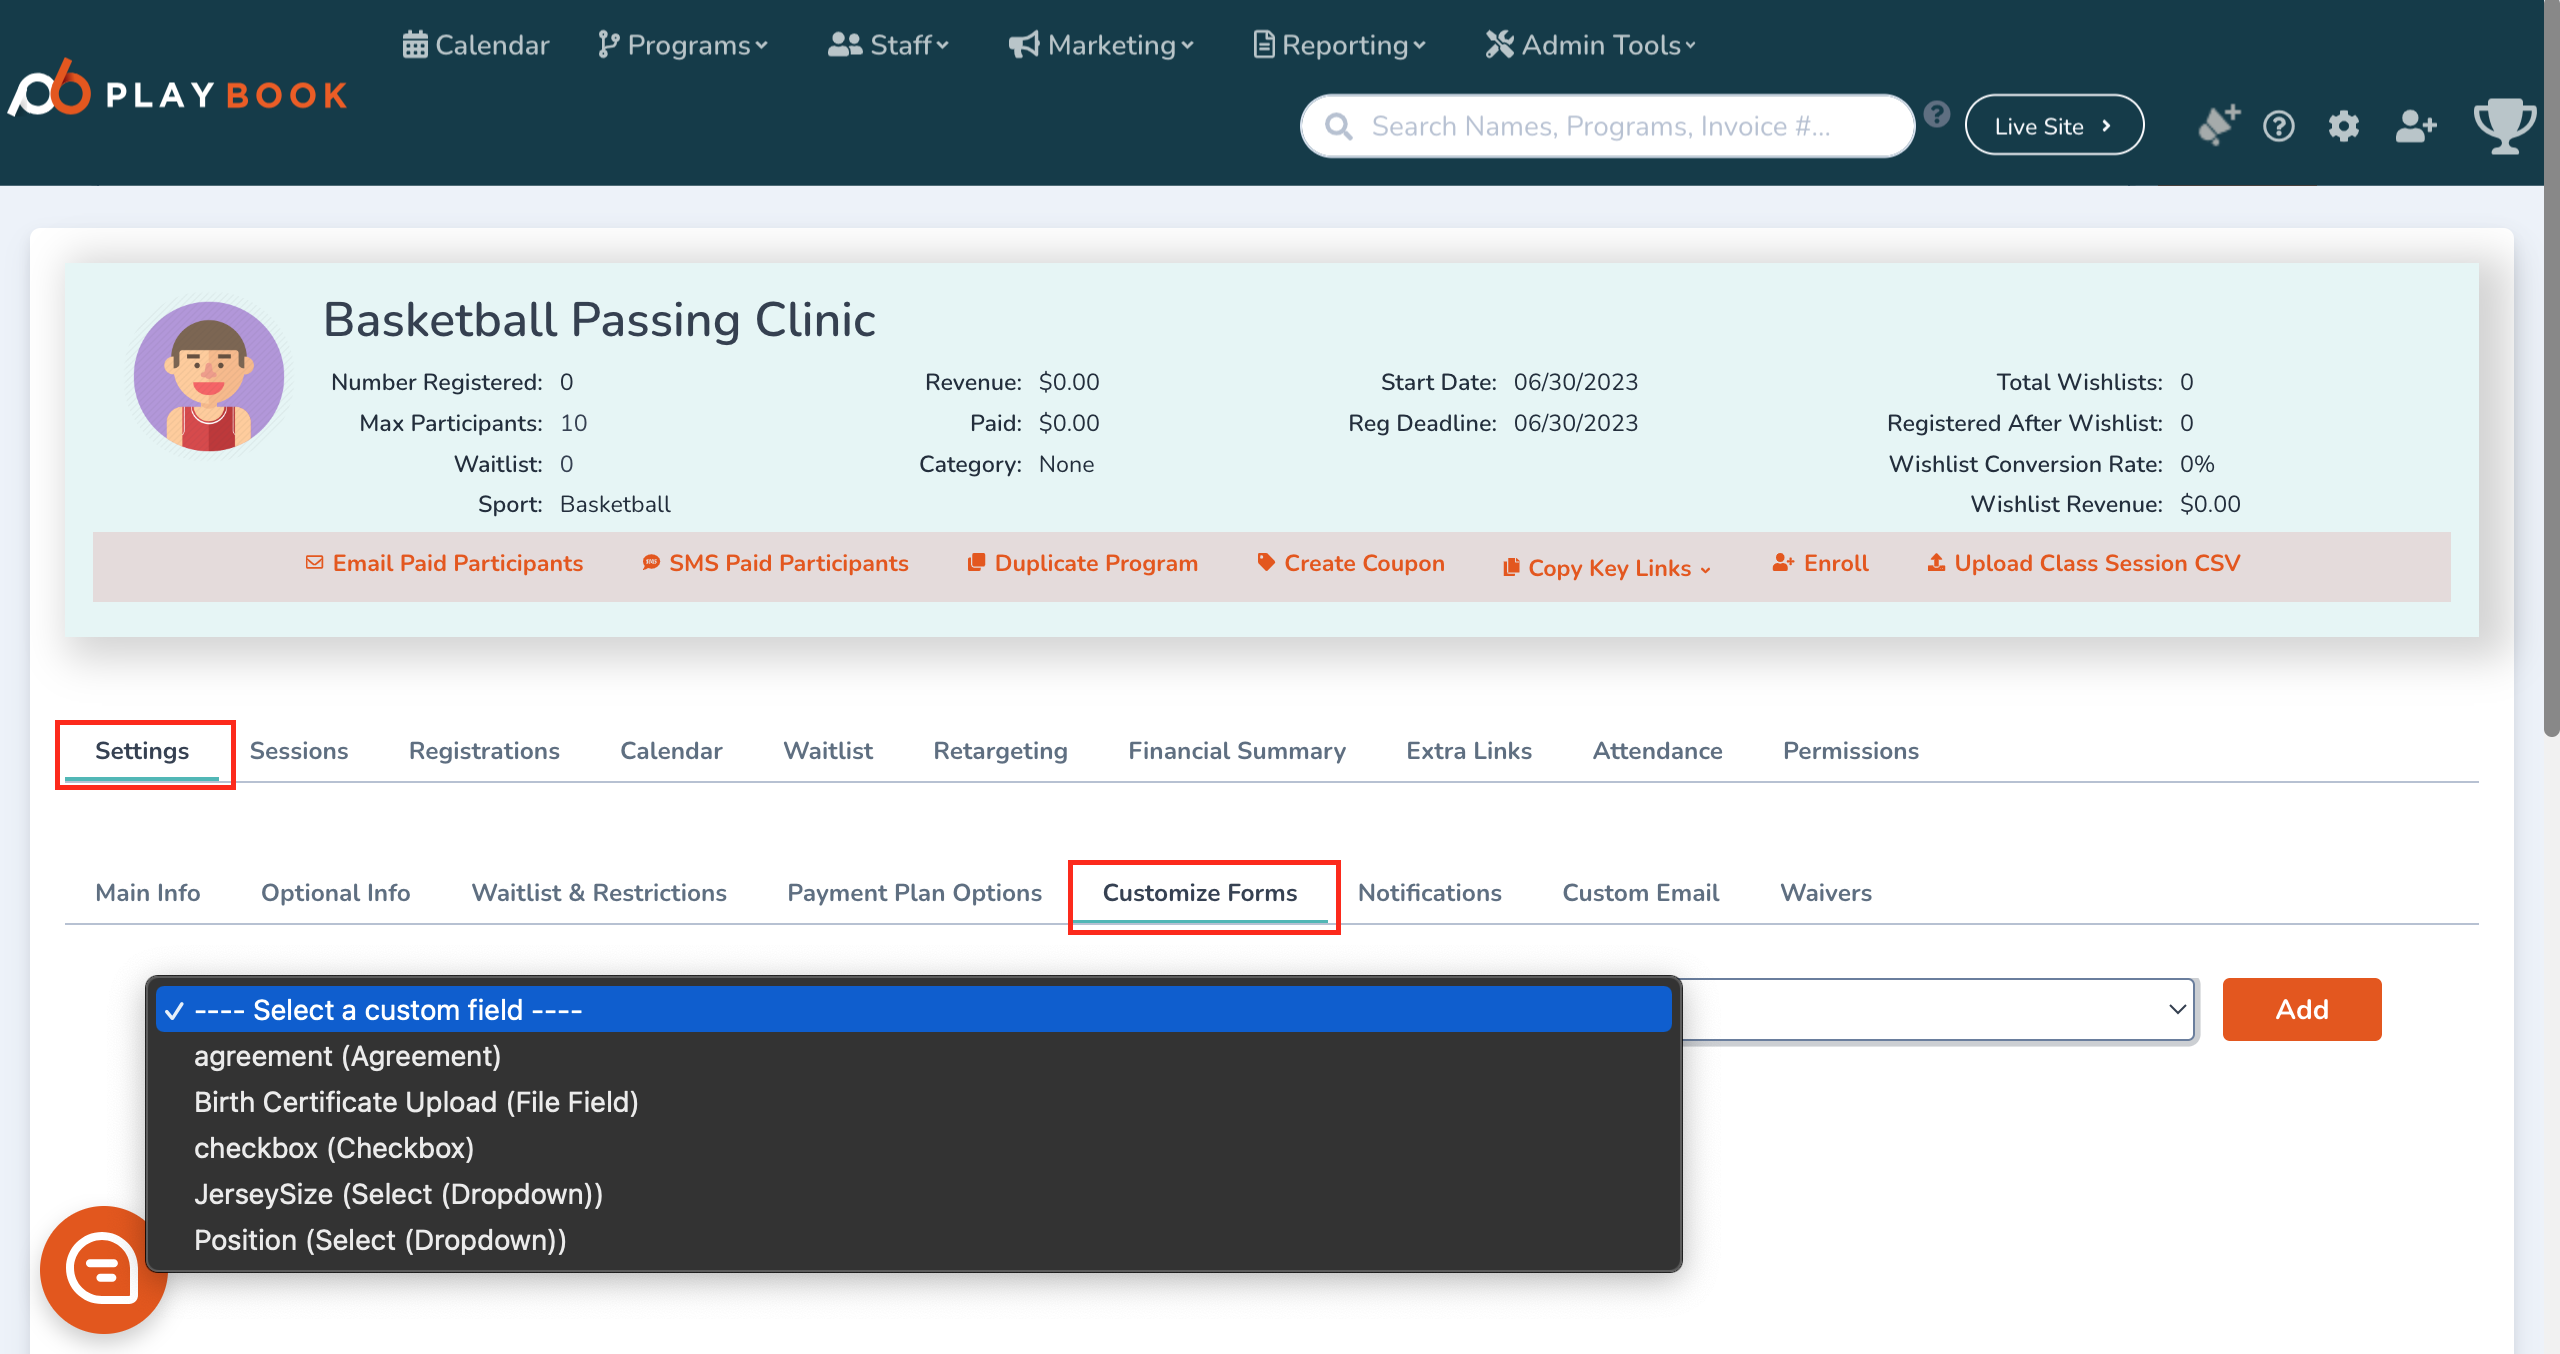
- Fields for Seasons.

- Note that there will be four different registrations options available to put the Custom Fields into (Free Agent, Captain, Team, Join Team). If you would like to add a custom field to multiple/all registration options, you must remember to add the field to each different option.
- Customize Forms for Program Packages
- Once you select the Custom Field from the drop-down menu, press the orange Add button
-
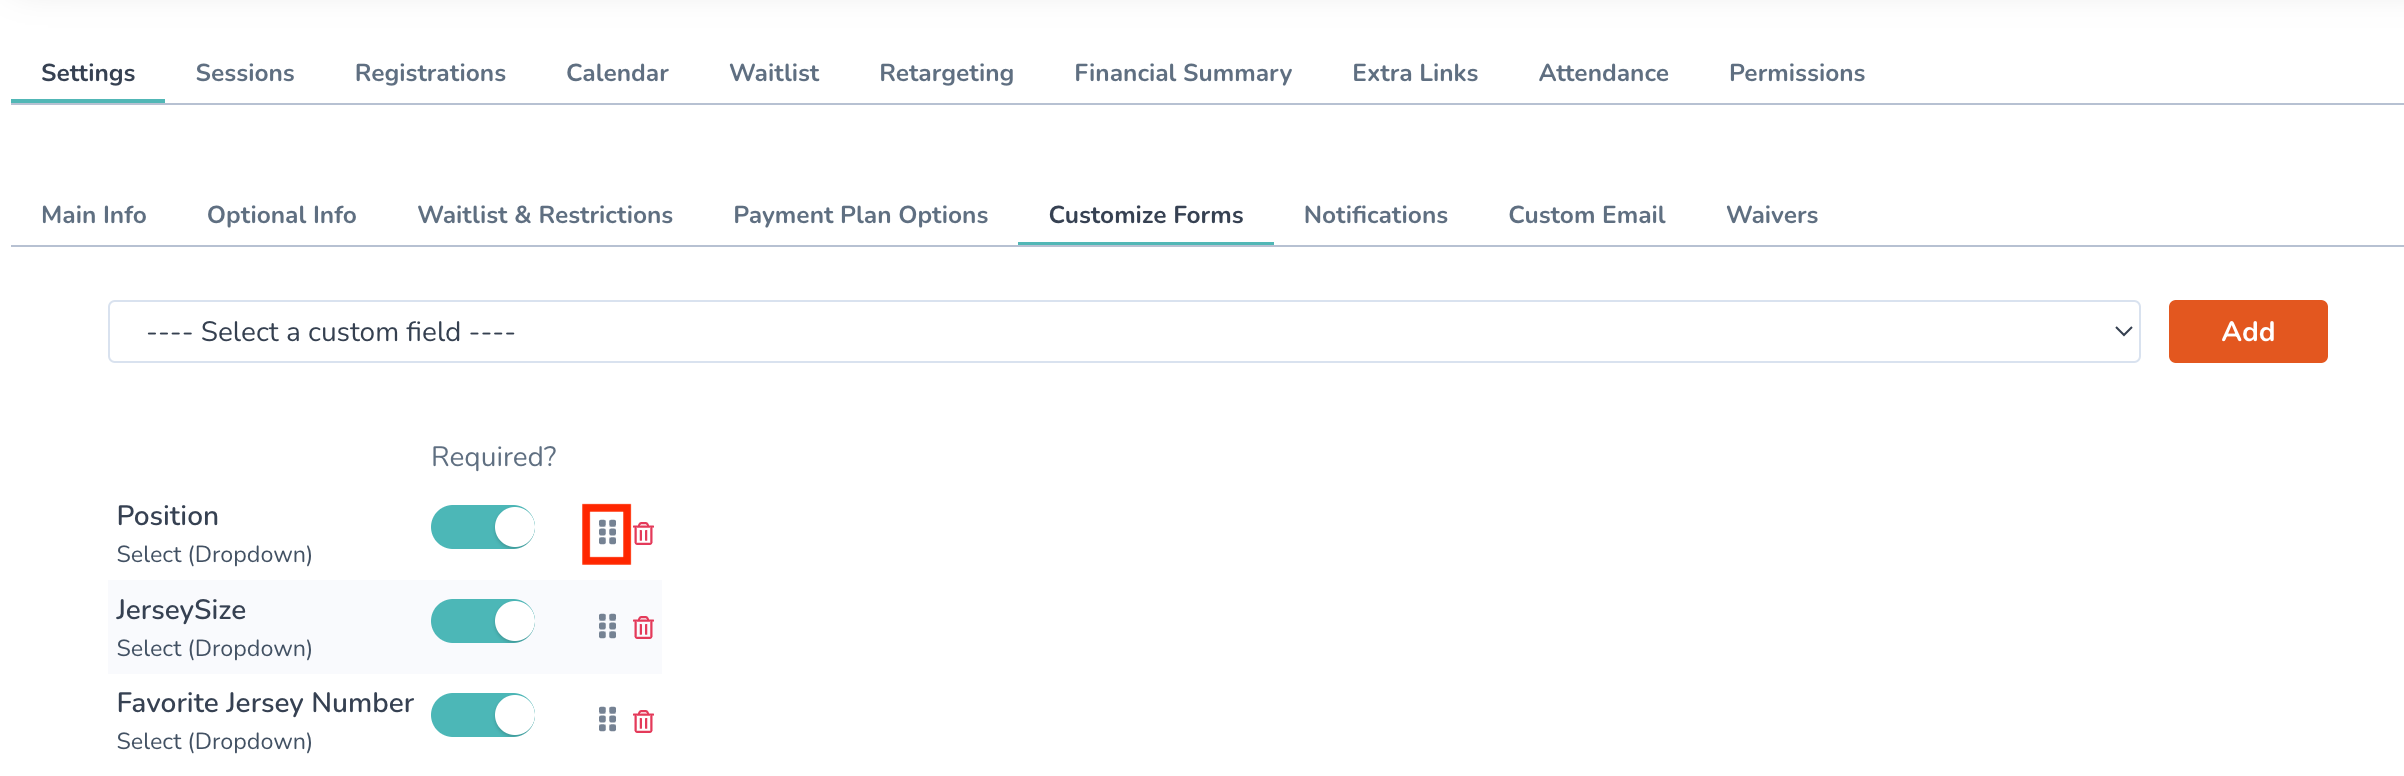
- Click and hold the Edit Order Icon (in the red box above) to edit the order of your custom fields
- Click on the Trash Icon to remove a custom field from your registration form
- Once you have chosen all of your Custom Fields, press Save
-